Billing
The Billing section on the Chisquares platform allows users to manage their payment details, view invoices, and handle team member billing permissions. This guide provides a step-by-step walkthrough of the billing interface and its functionalities.
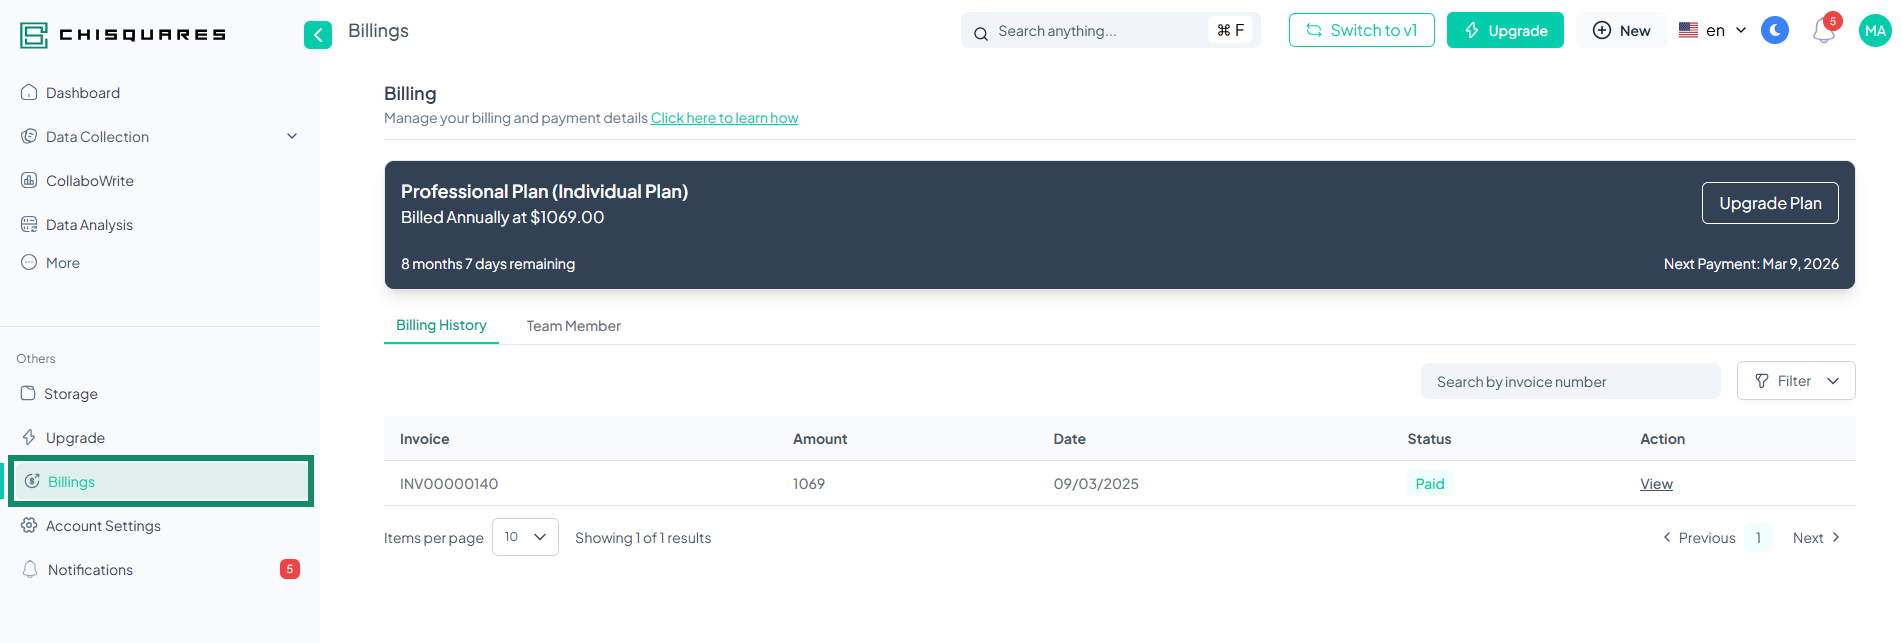
Accessing the Billing Section
-
Log in to your Chisquares account.
-
Navigate to the Billing tab in your dashboard.
-
(Full View Mode: The Billing option is located on the left pane under the "Others" section.
-
Collapsed Menu Mode: Click on the Billing icon (💰) to access the Billing.)
- You will see two main sections:
-
Billing History (default view)
-
Team Member Management
Subscription Details
-
Current Plan: Professional Plan (Organizational Plan)
-
Billing Cycle: Annually at $324,000.00
-
Subscription Status: Active
-
Time Remaining: 11 months 29 days
-
Next Payment Date: January 27, 2026
Billing History
The Billing History tab provides a record of all invoices.
Viewing Invoices
-
Locate an invoice from the list.
-
Click View under the Action column.
-
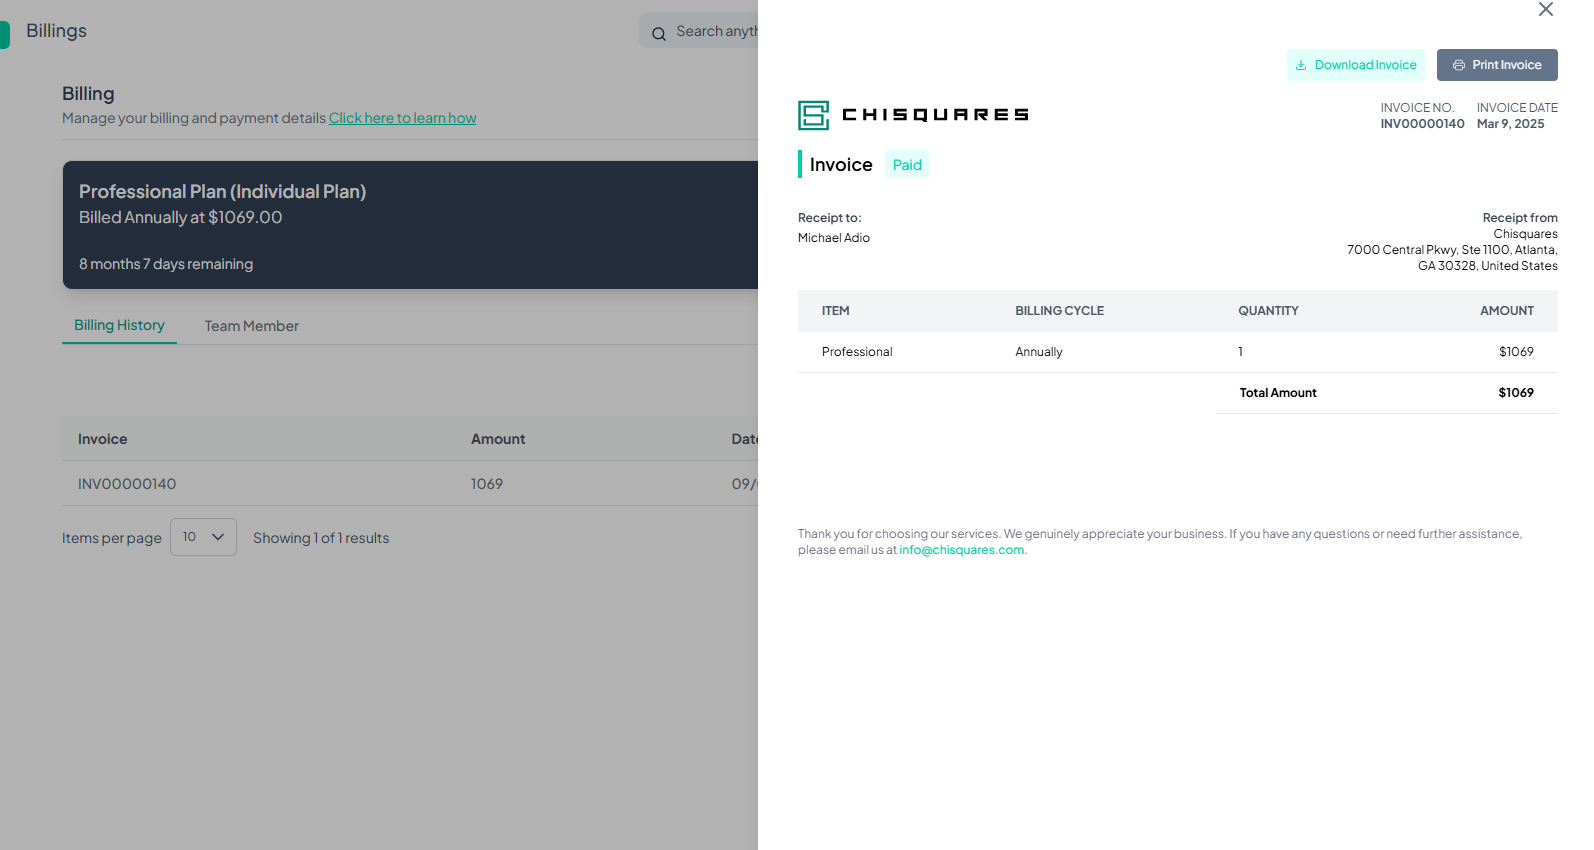
The invoice will display the following details:
-
Invoice Number
-
Invoice Date
-
Billing Status (Paid/Unpaid)
-
Receipt to (Customer Name)
-
Receipt from (Chisquares)
-
Itemized List of Services
-
Total Amount Due
Downloading or Printing an Invoice
- After opening an invoice, you have the option to:
-
Click Download Invoice to save a copy.
-
Click Print Invoice to print a physical copy.
Filtering Invoices
Users can filter invoices using the Filter button.
-
Click Filter.
-
Select a category:
-
Project Containing:
-
Study Design
-
CollaboWrite
-
Data Analysis
-
-
Created by:
-
Me
-
Others
-
- View the filtered results.
Searching for an Invoice
-
Use the Search by Invoice Number bar.
-
Enter an invoice number (e.g., INV00000007).
-
Press Enter to display results.
Team Member Management
The Team Member tab allows administrators to manage billing permissions for team members.
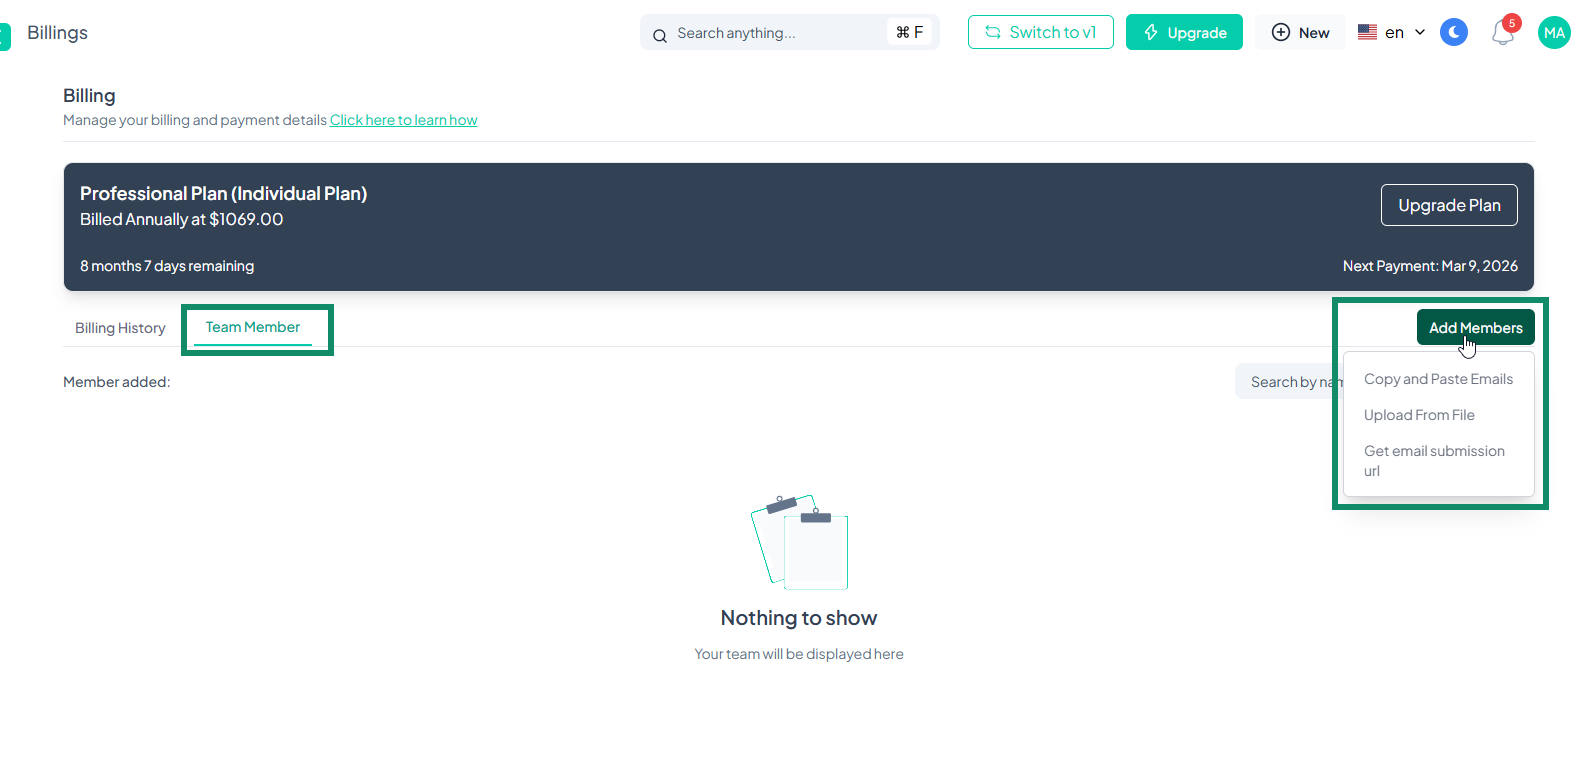
Adding a Team Member
-
Click Add Members.
-
Select an option from the dropdown list:
-
Copy and Paste Emails (Manually enter emails)
-
Upload From File (Upload a CSV or text file with email addresses)
-
Get Email Submission URL (Share a link for team members to join)
- Once added, the team member list will display the added users.
Searching for a Team Member
-
Use the Search by Name or Email bar.
-
Enter a team member's name or email.
-
Press Enter to locate the member.
Need Assistance?
For any billing-related inquiries, contact Chisquares Support:
- Email: info@chisquares.com


